What Is Claude Code?
If you’ve used ChatGPT or web Claude before, you know the drill. You type a question in the chat window, the AI replies with text, and you copy-paste that into another program. Even when you ask it to create a file, it just shows you the “code” as text—no actual file appears on your computer.
| Traditional AI (ChatGPT, Web Claude) | Claude Code | |
|---|---|---|
| Environment | Browser chat window | Your computer's terminal |
| File access | Cannot create/edit files (text only) | Directly reads, edits, and creates files |
| Excel/CSV | Must copy-paste contents | Opens and processes files directly |
| Code execution | Shows code but user must run it | Writes code and runs it immediately |
| Output | Text response (copy required) | Actual saved files (Excel, PDF, etc.) |
In a nutshell
Claude Code is “an AI assistant that does the work when you tell it to.”It runs in your computer’s terminal, not a browser, so it can directly handle files on your PC, write and execute code as needed, and save results as files.
For example, if you say “merge the 3 Excel files in my Downloads folder and create a summary table”—traditional AI would only tell you “here’s how to do it,” but Claude Code actually opens the files, merges the data, creates a new Excel file, and saves it. You just check the result.
Will It Run on My Laptop?
Claude Code runs on your computer, but the actual AI computation happens in the cloud (Anthropic’s servers). So you don’t need a high-end PC.
| Spec | Minimum | Recommended | Notes |
|---|---|---|---|
| CPU | Within last 5 years | Within last 3 years | Any standard office PC will do |
| RAM | 8GB | 16GB | 16GB recommended when running other programs simultaneously |
| Internet | Stable Wi-Fi | Ethernet or 5GHz Wi-Fi | Important since AI computation runs in the cloud |
| GPU | Not needed | Not needed | Cloud-based, so no GPU required |
| OS | Windows 10+ | Windows 11 | macOS fully supported as well |
A MacBook Air works just fine
MacBook Air, your standard company-issued laptop, a 5-year-old desktop at home—all work. No special hardware required. Just a stable internet connection. All the heavy AI computation is handled by Anthropic’s servers.
What Is a Terminal?
Claude Code runs in an environment called the “terminal.” Here’s a quick explanation for those who are unfamiliar.
| GUI (what you normally use) | Terminal | |
|---|---|---|
| Interaction | Click and drag with mouse | Type commands as text |
| Moving files | Drag and drop with mouse | Type mv filename foldername |
| Navigating folders | Double-click folders in file explorer | Type cd foldername |
| Running programs | Double-click an icon | Type claude (to run Claude Code) |
The terminal is “a window where you give commands to your computer using text.” It does the same things as using a mouse, but with the keyboard instead. It might feel daunting, but you only need 3–4 commands to use Claude Code. Don’t worry.
cd foldername      # Navigate to a folder
ls               # List files in the current folder
mkdir foldername   # Create a new folder
claude           # Launch Claude Code!
How to Open the Terminal
Mac
Press Cmd + Space to open Spotlight search, then type “Terminal.” It comes pre-installed on macOS, so no additional installation needed.
Windows
On Windows, we recommend WezTerm as your terminal app. The default Command Prompt (cmd) or PowerShell also work, but WezTerm is more convenient.
Download and install from wezterm.org. After installation, search for “WezTerm” in the Start menu to launch it.
Even if the terminal feels intimidating, don’t worry. After launching Claude Code, you’ll rarely need to type terminal commands directly. Just talk to Claude Code in plain English, and the AI runs the necessary commands for you.
Pricing — Which Plan Should You Choose?
To use Claude Code, you need an Anthropic Claude subscription. No complex API key setup needed—just subscribe and go.
| Plan | Monthly price | Claude Code | Usage | Notes |
|---|---|---|---|---|
| Free | $0 | Not available | — | Web chat only |
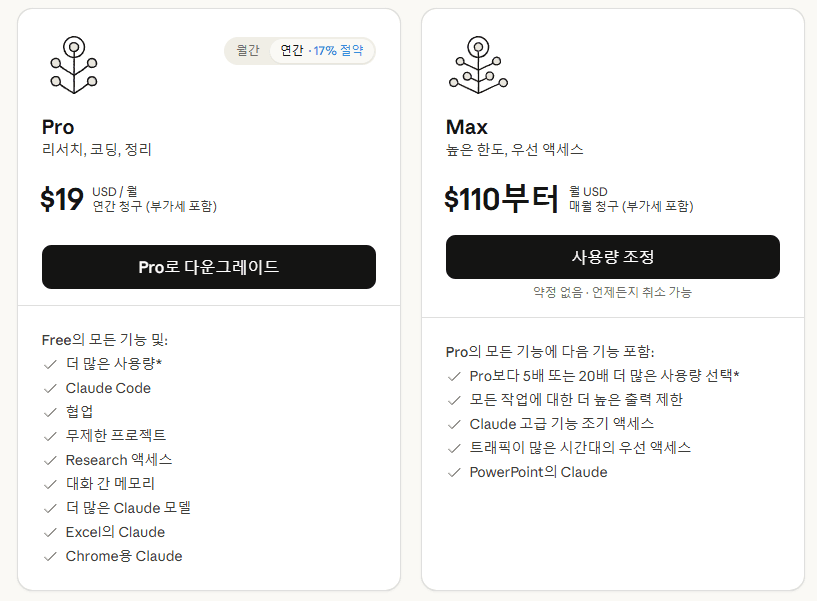
| Pro | $20/mo | Available | Basic allowance | Opus/Sonnet selectable, memory across chats |
| Max (5x) | $100/mo | Available | 5x Pro | Priority access during peak hours |
| Max (20x) | $200/mo | Available | 20x Pro | For heavy users |
Pro plan heads-up
Pro ($20/mo) supports Claude Code, but heavy usage will exhaust the daily limit in about 1 hour. Claude Code makes multiple API calls per task, so it consumes usage much faster than web chat. Once you hit the limit, you have to wait until the next day.
We strongly recommend Max ($100/mo)
$100 might feel steep at first, but in practice you can save 5–10 hours per week. The value per hour more than justifies the cost. Pro is fine for “trying it out,” but for real work use, the usage is far too limited. We recommend starting with Max from day one.
Here’s the summary:
- Free: Cannot use Claude Code. Web chat only.
- Pro ($20/mo): For trying it out. Light experimentation. About 1 hour of daily use.
- Max ($100/mo): For real work. Generous usage allowance + peak-hour priority.
Subscribing to Claude
The subscription process is dead simple. Takes about 5 minutes.
Go to claude.ai
If you don’t have an account yet, sign up with your email. You can also sign up with a Google account.
Click the Subscribe button
After logging in, find the “Upgrade” or “Subscribe” button in the left sidebar or Settings.
Choose Pro or Max
For serious work use, choose Max ($100/mo). To try it out first, choose Pro ($20/mo).
Complete payment
You’ll need an internationally accepted card (VISA, MasterCard, etc.). Once payment is confirmed, you can immediately start using Claude Code.
No API key needed
Previously, using Claude Code required a separate API key. Now, you just need a subscription. The complex API setup process is gone—after subscribing, move straight to the installation step.
Prerequisites
Since late 2025, Claude Code provides a native installer, so there’s almost nothing to install beforehand. Check your operating system below.
Required pre-installations
# 1. Install Git (recommended)
# Download from https://git-scm.com and install
# (Keep all default options, just click Next)

# 2. Install WezTerm (terminal)
# Download from https://wezterm.org and install

# Verify installation (in WezTerm or PowerShell)
git --version
Windows users note
On Windows, install 2 things: Git and WezTerm. Both can be downloaded from their official sites—just click the download button and hit “Next” through the installer. No special configuration changes needed; keep all defaults.
Mac users note
Mac already has Git installed and comes with a Terminal app, so there’s nothing extra to install. Go straight to the next step.
Do I need Node.js?
Claude Code now provides a native installer, so you don’t need to install Node.js beforehand. Python and Node.js aren’t needed for Claude Code itself, but you may want them installed since automation scripts might use them.
Once installation is complete, verify in the terminal with this command.
git --version
# e.g.: git version 2.43.0
If a version number appears, the installation was successful. The exact version number may differ—as long as you see a number, you’re good.
Installing Claude Code
Time to install Claude Code! One command in the terminal is all it takes.
Claude Code installation command
irm https://claude.ai/install.ps1 | iexWindows users note
On Windows, run the command above in PowerShell or WezTerm. It may not work in the regular Command Prompt (cmd). When you open WezTerm, PowerShell launches by default.
Alternative installation methods
If you use a package manager, these work too:
- Windows:
winget install Anthropic.ClaudeCode - Mac:
brew install --cask claude-code
After installation, verify with this command.
claude --versionIf a version number appears, the installation succeeded. Congratulations!
If you get a claude: command not found error, close the terminal completely and reopen it. If that doesn’t work, restart your computer and try again. This resolves the issue in most cases.
First Launch
It’s best to run Claude Code inside a specific “workspace folder.” Let’s create one first.
Creating a workspace folder
mkdir %USERPROFILE%\Desktop\autowork
cd %USERPROFILE%\Desktop\autowork
We just created a folder called autowork on the desktop and navigated into it. This will be your default workspace going forward.
Now let’s launch Claude Code.
claudeJust type this one word and Claude Code starts. On first launch, you’ll go through a login process (explained in the next section).
When you run the claude command, Claude Code treats the current folder as its “workspace.” It can read and write files within this folder. That’s why you should always navigate to your desired workspace folder first before running claude.
How to Log In
When you run claude for the first time, it asks how you want to authenticate. Three options appear—since we have a subscription, select the first one.
How would you like to authenticate?
> 1. Claude account with subscription  ← This one!
  2. Anthropic API key
  3. Connect to remote server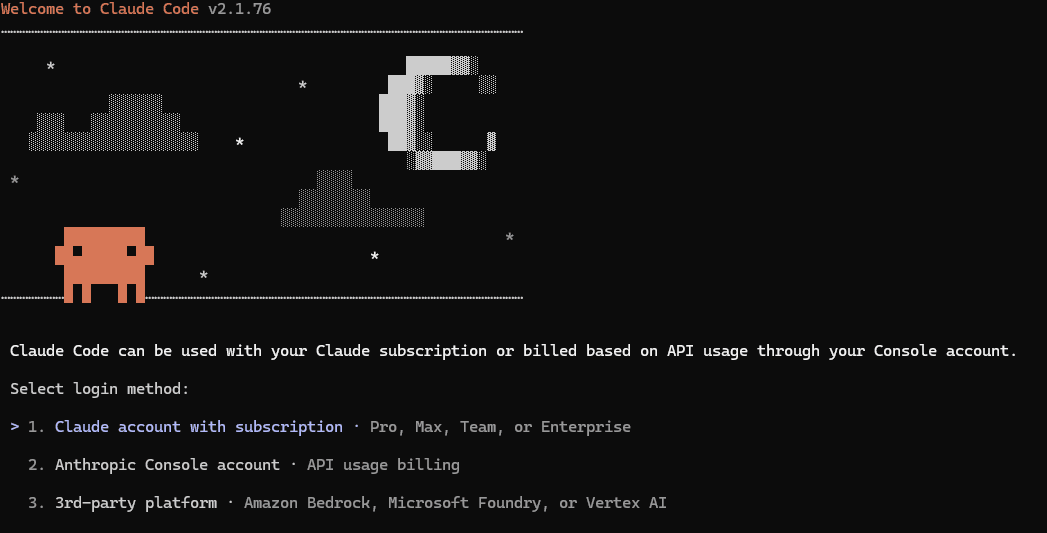
Select “Claude account with subscription”
Use the arrow keys to navigate and press Enter. Since we subscribed to Pro or Max, select this option.
Your browser opens automatically
A Claude login page appears. If you’re already logged in to claude.ai, you’ll see the authorization screen right away. If not, log in first.
Return to the terminal
After completing authorization in the browser, you’ll see a message like “Successfully authenticated” in the terminal. Login successful!
Browser not opening?
A URL will be displayed in the terminal. Copy that URL and paste it directly into your browser. Use this method if your company’s security policy blocks automatic browser launches.
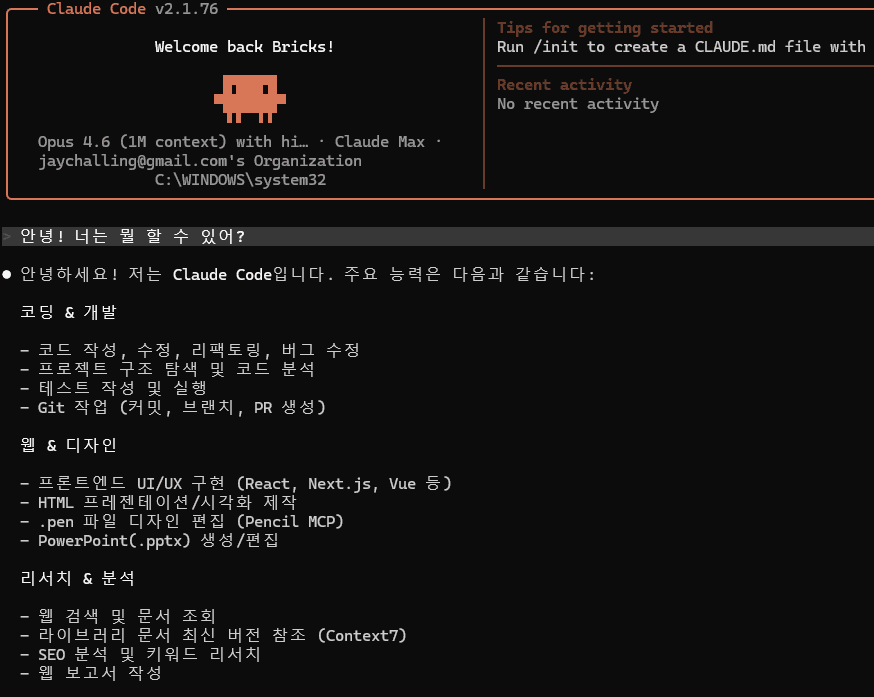
First Conversation: Hello!
Once logged in, Claude Code is ready and waiting for input. Let’s have our first conversation!
Hello! What can you do?Claude Code will describe its capabilities. Here’s the gist:
- File read/write: Can read files in the current folder, create new ones, and edit existing ones.
- Code writing & execution: Can write Python, JavaScript, and other code and run it immediately. You don’t need to know coding.
- Folder browsing & search: Can explore folder structure and search for specific files or content.
- Data analysis & conversion: Can analyze and convert data in Excel, CSV, JSON, and other formats.
Try your first hands-on exercise
Try saying this next: “Create a hello.txt file in the current folder and write ‘Hello! Claude Code first run success!’ in it.” You’ll see an actual file appear in the autowork folder on your desktop.
When you request file creation, Claude Code first asks “Shall I create this file?” for your approval. Press yto approve and the file gets created. This approval step is a safety measure to prevent AI from modifying files without your permission.
Recommended Terminals (Optional)
The default terminal (PowerShell, Terminal.app) works fine, but if you want a better experience, consider installing a dedicated terminal.
| Windows — WezTerm | Mac — Ghostty | |
|---|---|---|
| Rendering | GPU accelerated — smooth and fast scrolling | Metal native — noticeably faster |
| Feature 1 | Tabs + split panes | Zero config — looks great out of the box |
| Feature 2 | Image display support | Crystal-clear fonts on Retina |
| Feature 3 | Cross-platform (Win/Mac/Linux) | Maximum memory efficiency (built with Zig) |
| Download | wezfurlong.org | ghostty.org |
No rush on this. Install them later when you have free time. The default terminal handles all exercises just fine.
Effort — AI’s “Thinking Intensity”
Even with the same model, you can control how deeply it thinks. This is called “Effort.”
| Effort | Characteristics | Token usage | Best for |
|---|---|---|---|
| Low | Minimal thinking, fast responses | 50-70% savings | Simple questions, renaming files |
| Medium | Balanced thinking, speed vs. quality | Default | Most coding tasks |
| High | Deep thinking (Extended Thinking) | 30-50% more usage | Complex design, debugging |
> /config
→ Set effort → medium (or low, high)
Medium is great to start
Medium delivers solid quality for most tasks while keeping token usage reasonable. For truly simple tasks use Low, and temporarily switch to High for complex design work, then switch back.
Token-Saving Strategy
The Pro plan has a usage limit. Let’s look at strategies to use it efficiently.
| Config | Combination | Estimated usage time |
|---|---|---|
| Opus + High | Top quality, most expensive | Limit reached in 30 min - 1 hour |
| Sonnet + High | Good quality, fast consumption | 1-2 hours |
| Sonnet + Medium | Best quality/cost balance | 2-3 hours of comfortable use |
| Sonnet + Low | Optimal for simple tasks | 3-5 hours |
> /model       → Select sonnet
> /config      → Set effort → medium
Pro users: must read
The Pro plan ($20/mo) can exhaust its limit in about 1 hour of focused use. With the Sonnet + Medium combo, you can comfortably use it for 2–3 hours. If you plan to use it seriously for work, we recommend Max ($100/mo, 5x usage).
Claude Dashboard Plugin
This plugin lets you monitor your token usage in real time. Once installed, a usage bar appears at the bottom of Claude Code.
Installation is simple. Just say this to Claude Code.
Install the claude-dashboard plugin.
The official repo is https://github.com/uppinote20/claude-dashboard
Claude Code will clone the repository and configure it automatically. Once installed, token usage, remaining quota, and reset time are displayed in the status bar.
Why is this useful?
Getting a sudden “limit exceeded” on the Pro plan is frustrating. With the dashboard, you can monitor remaining quota and adjust your usage intensity. If you’re running low, switch Effort to Low or focus on simpler tasks.
Checkpoint
If you’ve followed along this far, check all the items below.
All checked?
Congratulations! You’re all set to use Claude Code. In the next chapter, we’ll learn about execution modes and dive into hands-on exercises. From Playwright installation to design, Excel, and Gmail automation—just follow along step by step.
Stuck on something?
If you encounter an error or get stuck during installation, copy the exact error message and paste it into the claude.ai web chat to ask for help. Most installation issues have straightforward solutions.